How to Start a Website in India
How to Start a Website in India (Step-by-Step Guide for Beginners 2026)
Starting a website in India in 2026 is easier, faster, and more affordable than ever. Whether you want to create a blog, business website, portfolio, or online store, this step-by-step guide will show you exactly how to launch your website from scratch — even if you have zero technical knowledge.

In this complete beginner’s guide, you will learn:
- How to choose a domain name
- How to buy web hosting
- How to install WordPress
- How to design your website
- How to make your website live
Let’s get started.
Step 1: Choose a Website Type
Before buying anything, decide what type of website you want to create.
Common website types in India:
- Blog
- Business website
- Portfolio website
- E-commerce store
- Affiliate website
Your website goal will determine the tools and hosting plan you need.
Step 2: Choose a Domain Name
A domain name is your website’s address (example: yourwebsite.com).
Tips for Choosing a Good Domain:
- Keep it short and simple
- Use easy-to-spell words
- Avoid numbers and hyphens
- Choose .com if possible
You can buy a domain from providers like:
- Namecheap
- GoDaddy
Many hosting providers also give a free domain with their plan.
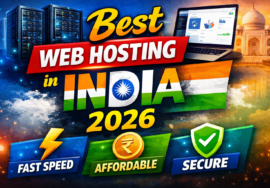
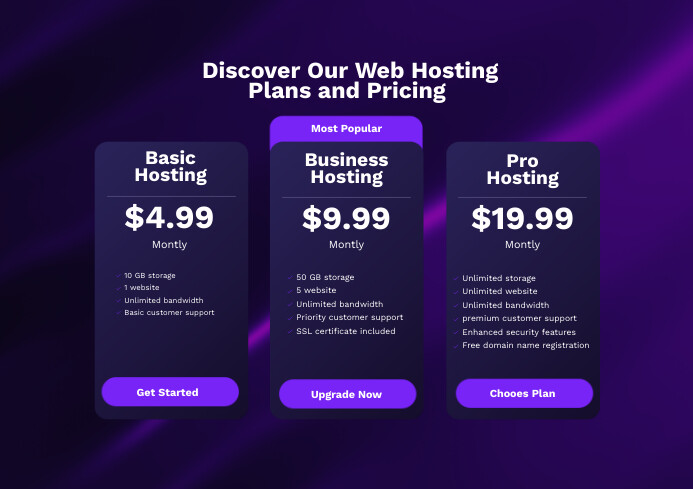
Step 3: Buy Web Hosting (Most Important Step)
Web hosting is where your website files are stored. Without hosting, your website cannot go online.
If you are a beginner in India, I recommend:
🏆 Hostinger (Best for Beginners)


Why Hostinger?
- Affordable pricing
- Free SSL certificate
- Free domain (on selected plans)
- One-click WordPress installation
- Beginner-friendly dashboard
- 24/7 customer support
👉 Start Your Website with Hostinger (Insert Affiliate Link)
Hosting plans usually start under ₹3,000 per year during offers.
Step 4: Connect Domain and Hosting
If you purchased domain and hosting from the same provider, this step is automatic.
If you bought them separately:
- Go to your domain provider dashboard
- Change Nameservers
- Add hosting nameservers
This connects your domain to your hosting server.
Step 5: Install WordPress
WordPress is the most popular website platform in the world.
Over 40% of websites use WordPress because:
- It is beginner-friendly
- It is free
- It has thousands of themes and plugins
- It is SEO-friendly
To install WordPress:
- Log in to your hosting dashboard
- Click “Auto Installer”
- Select WordPress
- Enter website name
- Set username & password
- Click Install
That’s it. Your website backend is ready.
Step 6: Choose a Professional Theme
A theme controls your website design.
Good free WordPress themes:
- Astra
- GeneratePress
- Kadence
Choose a lightweight theme for better speed and SEO performance.
After installing the theme:
- Customize logo
- Set colors
- Create homepage
- Add menu
Step 7: Install Important Plugins
Plugins add extra features to your website.
Install these essential plugins:
- Rank Math or Yoast SEO (for SEO optimization)
- LiteSpeed Cache (for speed)
- WPForms (for contact forms)
- Wordfence (for security)
Do not install too many plugins. Keep your site clean and fast.
Step 8: Create Important Pages
Every website must have these pages:
- Home
- About Us
- Contact
- Privacy Policy
- Terms & Conditions
If you are planning affiliate marketing, add:
- Affiliate Disclaimer page
These pages increase trust and help with Google rankings.
Step 9: Optimize for SEO
SEO (Search Engine Optimization) helps your website rank on Google.
Basic SEO steps:
- Use the focus keyword in the title
- Add a keyword in the first paragraph
- Use H2 and H3 headings
- Add internal links
- Add meta description
- Compress images
For example, if your keyword is:
“How to Start a Website in India”
Make sure it appears naturally throughout the article.
Step 10: Publish and Promote
Once everything is ready:
- Publish your homepage
- Submit website to Google Search Console
- Share on social media
- Create useful content weekly
Consistency is key for traffic growth.
How Much Does It Cost to Start a Website in India?
Here is a rough estimate:
- Domain: ₹700 – ₹1,000 per year
- Hosting: ₹2,000 – ₹3,000 per year
- Total: Around ₹3,000 – ₹4,000 annually
You can start a professional website for less than the cost of a mobile recharge.
Frequently Asked Questions
Is coding required to start a website?
No. WordPress allows you to create a website without coding.
How long does it take to create a website?
You can set up a website within 30–60 minutes.
Which hosting is best for beginners in India?
Hostinger is currently one of the most affordable and beginner-friendly options.
Final Thoughts
Starting a website in India in 2026 is one of the best investments you can make. Whether you want to build a personal brand, grow a business, or earn through blogging and affiliate marketing, having your own website gives you complete control and long-term growth opportunities.
The process is simple:
- Choose domain
- Buy hosting
- Install WordPress
- Design your website
- Publish content
If you are serious about launching your website today, choose a reliable hosting provider, follow the steps in this guide, and take action.